AWeber is a fantastic email marketing and email automation tool, and comes with lots of features. In this guide, I will show you how to add one subscriber at a time to your lists, and how to import multiple subscribers.
AWeber is a powerful, free, email marketing tool to build newsletters, landing pages, email automation and much more. If you want to set up a free account and start your mailing list, you can use my advocate link.

Before you can add a subscriber to your mailing list, you need to have permission from them. If they have signed up to a marketing list before and given you permission to email them, this is fine. However, if you just have their email, this does not mean you have permission to add them to your list.
Adding New Subscribers
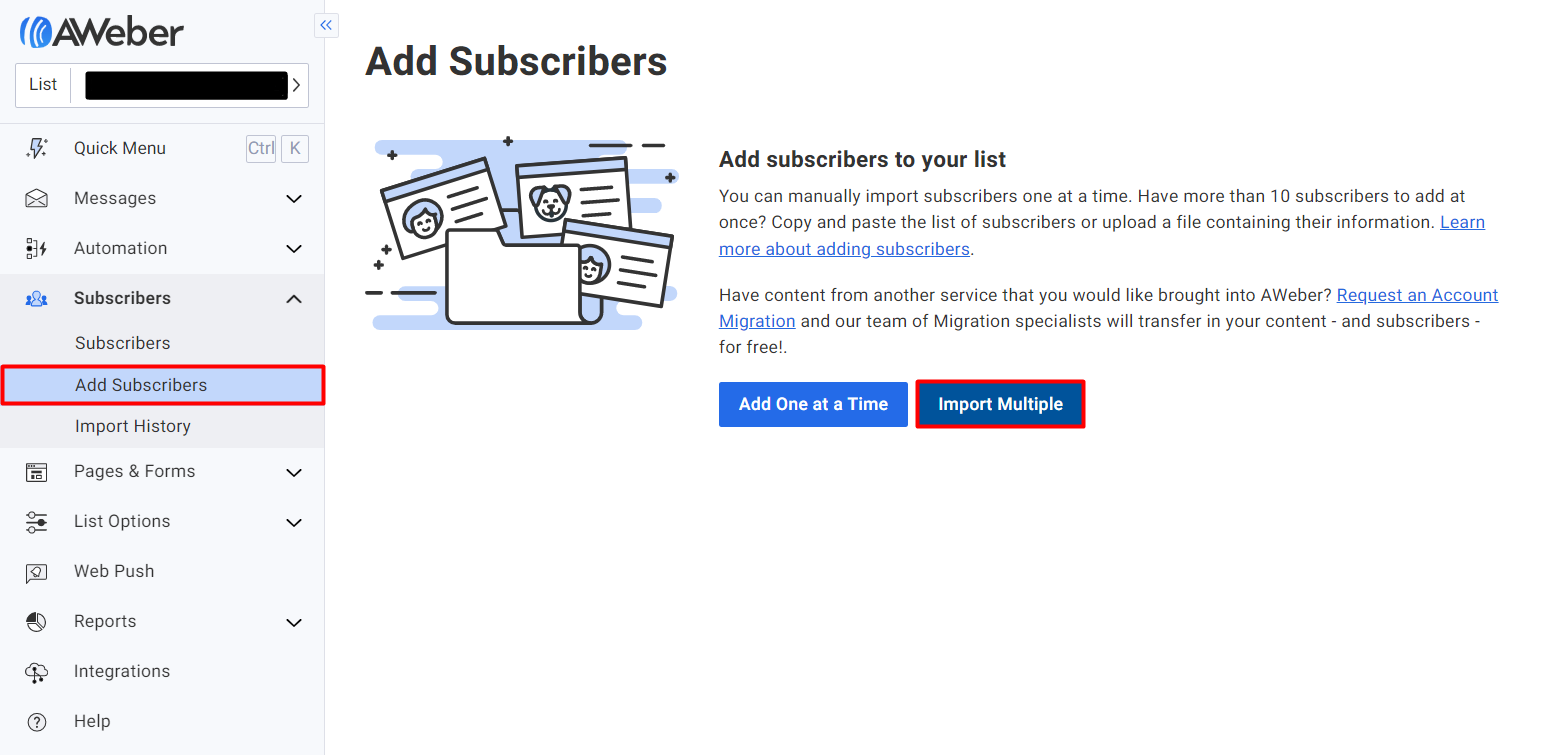
To add new subscribers, you will want to log in to AWeber, and select what list you want to use. Then, click ‘Subscribers’ on the left side, and then click ‘Add Subscribers’. Here you will see 2 options:
- Add one at a Time
- Import Multiple
Add one Subscriber at a Time
On the ‘Add Subscribers’ screen, click ‘Add one at a Time’ to start adding subscribers manually.

Now you will see a form with name, email, ad tracking, tags and a custom field for date added.
The ‘Ad Tracking’ box is used to label how they signed up to your list. For example: “website” or “tradeshow.”
Tags
The tags box let’s you add custom tags for this subscriber – this way you can add them to a segment to filter your mailing list, or add them directly to a campaign you have set up.

If you only need to add the basic details, once you added the name and email, scroll down to the bottom of the page and click ‘Add Subscriber’.
Custom Fields
By default you must add the date when adding a new subscriber. But you can also add custom fields. Custom fields are used to store more details about your subscribers.

Click on the link ‘custom fields’ to add up to 25 custom fields. Below is a video of how to add them.
When on the page you will see ‘Add Custom Field’ in the top right, click this button to open the editor. Now you can type the name of your custom field. Once happy, click add. Then it will appear on your list.
Once you have added all the custom fields you want, go back to adding your subscribers. Now you will see the list of your custom fields.

Before you can add a subscriber, you need to check that you have permission, and check the ‘confirmation message settings’ on AWeber.
Once you have added all your subscriber information, click the blue ‘Add subscriber’ button at the bottom of the page.
Importing Multiple Subscribers
On the ‘Add Subscribers’ screen, click the button ‘Import Multiple’ to begin.
With Aweber you can use a spreadsheet to add multiple subscribers at once. This is ideal if you have a long list, or have exported a list from a previous provider.
Importing subscribers is easy with AWeber, but you will need to ensure you have your spreadsheet formatted correctly. We would advise using an Excel or Google Sheets spreadsheet. But you need to download / save your spreadsheet as an xlsx file.
Spreadsheet Formatting
You need to have several columns on your spreadsheet so your subscribers can be imported correctly. The easiest way to do this, is to have a 4 column spreadsheet including; First Name, Last Name, Name and Email Address. You can download this template (xlsx file) to help.

Importing Subscribers
Once you have your spreadsheet, you can upload it to AWeber. On the ‘import multiple’ page, drop and drag or select your spreadsheet.

Once you had uploaded your sheet, click the ‘Map fields’ button in the bottom right.
Map Subscriber Info
In this section, AWeber will ask you to map your data. This is so AWeber knows what data to put in the subscriber fields. You will see a table with 2 columns, the first column will have your data, and the second column will be for the subscriber fields.
If you have used a template similar to one in this guide, this will be very easy, as most fields will be mapped. All you need to do is select the appropriate field for each subscriber field, and ensure to select the ’email’ field.

Confirm Opt-in
When you have mapped all your subscriber fields, you can click the next button. Now you will be asked if you want these new subscribers to confirm their subscription.
If you select No, you can move to the next section. If you select Yes, you will see your confirmation message. This is the message that will be sent to all the subscribers you are importing, so they can confirm they want to be subscribed to your list.
This is the best way to ensure your email marketing is GDPR compliant. You always need to be sure you have permission from any subscriber to send them emails.
You can change your confirmation message – click ‘Go to List Settings…’ – you can change the content and subject line of your confirmation message here. Learn more about how to change your confirmation message.
More Options
You have the option to add ‘tags’ to all your imported subscribers. These will appear in AWeber, and help you group and identify different subscribers. For example, you could tag this import as ‘January 2023’.
Simply click the ‘add tags’ button and add your tags, separated by a comma.
Background Info
Finally you will be asked 2 questions.
‘How did these subscribers join your list?’
There are 4 options for this question, and you will need to provide further details for each.
| Option | Further details |
| They signed up on my website | Put your website in the answer box |
| They gave me their info in person | You will need to say when, where, and how you got their information to your mailing list |
| They bought my product or service | You will need to say what product they bought and where they bought it. Also say if you told them you will add them to your mailing list |
| I purchased this list | You will need to say where you purchased this list of subscribers |
| Other | If the other options don’t apply, you can use this option with a box to add your reason |
You need permission from anyone you add to your mailing list.
‘Let us know if you are importing these subscribers from another email provider’
If you have used a provider before for email marketing, like Mailerlite or Mail Chimp, you can say so here.
If you choose ‘Yes, they are coming from another provider’ you can select which provider you used from the list. Selecting ‘No’ will not ask for anything.
Submit your Import
Once you have followed all the steps above, you can now submit your import with the blue button in the bottom right.
It’s important to note that AWeber will confirm your import, and may take a few hours to verify everything. If something is wrong with your import, they will let you know.
FAQs
That’s it! If you have any questions on how to add subscribers to your mailing list, one at a time or importing multiple at once, leave a comment or email me.
As an AWeber Advocate, I will earn commission if anyone chooses to open up a paid account with AWeber, by clicking my links or banners associated with AWeber.
